The Paper Bag Princess
The Paper Bag Princess was one of the many memorable books that shaped my childhood. It has everything a kid could want in a story: a quick witted princess, a beastly dragon, and a prince (even if he is a bum). Growing up, I loved that Princess Elizabeth’s wiliness helped her figure out how to get what she wanted (despite having lost everything); she even outsmarted a dragon! Princess Elizabeth thought she wanted to marry Prince Ronald, and went so far to as get him back from the dragon who kidnapped him. When she finally helped him escape, he ungratefully rejected her.
I loved that Princess Elizabeth was perceptive enough to realize that she could make her own happily ever after, and recognize that it didn’t include the bum: Prince Ronald. There are so many wonderful lessons to learn from this story: how we can conquer our own dragons, how we can find happiness after loss, and the importance of grit. Plus, The Paper Bag Princess is just an entertaining silly story that children love.
On Saturday, March 4th, Elizabeth —the paper bag princess herself— has the whole day dedicated to her and her story. Annick Press and Robert Munsch graciously created a free digital downloadable Paper Bag Princess kit that includes activities for kids of all ages. Print these fun activities out for March 4th, listen (or read) The Paper Bag Princess, don your fabulous crowns, and cuddle under a snuggly quilt to create some lasting memories! Share your Paper Bag Princess Day activities on Instagram with #PBPDay and #CobabeCo.
(As an Amazon Associate I earn money from qualifying purchases)
Quilted Fabric Crown Tutorial
No Paper Bag Princess Day is complete without a crown! To add a little whimsy to your dress up collection (whether it be for Princess Elizabeth or King of the Wild Things) make your little one a quilted crown to celebrate.
Materials needed:
six coordinating fabric squares measuring 6.25” x 6.25”
backing fabric 21” x 7.5”
batting 21” x 7.5”
fabric scissors or rotary blade
interfacing or stabilizer 21” x 7.5” (anything you have on hand that provides structure will work)
thread and needle
sewing machine
ribbon
fabric marker/hera marker
pins/fabric clips
embellishments to decorate your crown
This is a great project for using leftover quilt blocks, or for whittling down your scrap stash.
STEP ONE:
Measure your child’s head with ribbon. Cut the ribbon the length of the circumference of your child’s head. Cut another ribbon of the same length for a total of two ribbons.
STEP TWO:
Make twelve half square triangles (there’s a trick to get ‘er done quick!) Use the following “four-at-a-time” technique to make twelve half square triangles (HSTs). OR dig deep into your scrappy cave of wonders and pull out leftover blocks from previous projects (making sure the block size is 4”).
Place two 6.25” squares right sides together and mark two diagonal lines through the center. Then sew a 1/4” away from all four sides. Then cut on each of the diagonal lines you drew. Open up your HSTs and press the seams to one side. Trim HSTs to 4” squares.
STEP THREE:
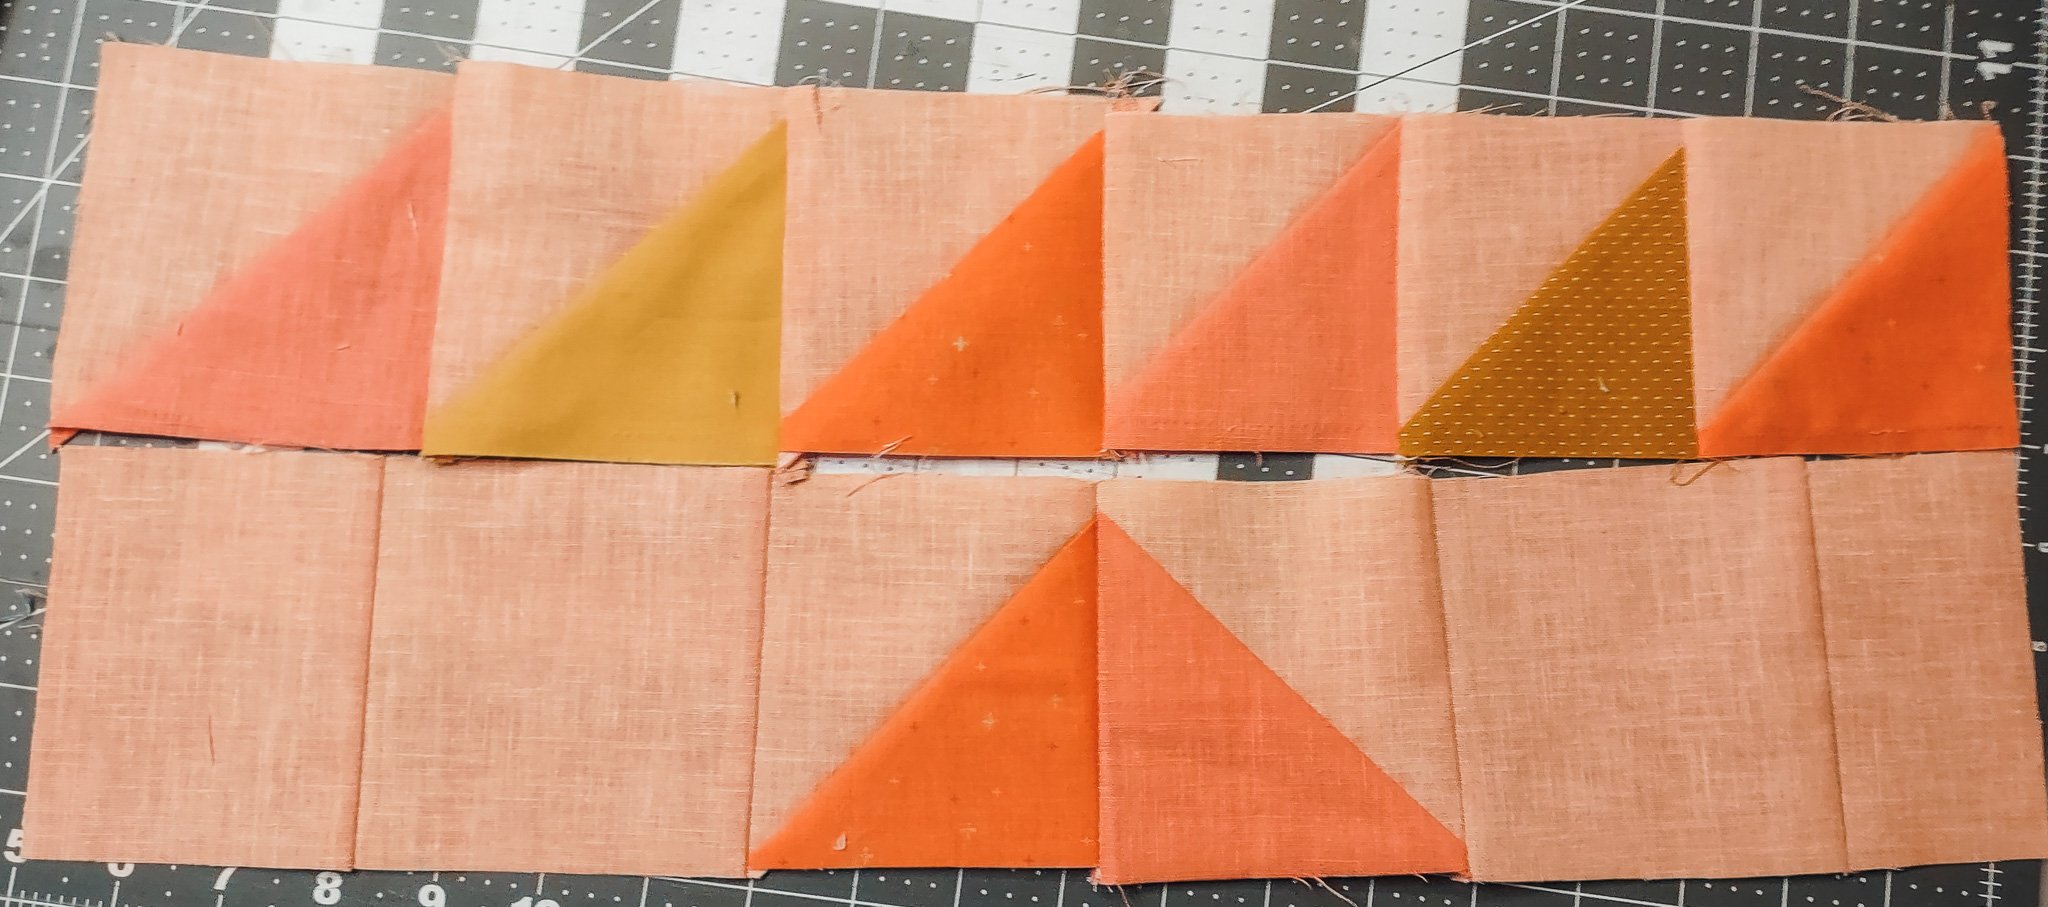
Lay out two rows of six HSTs in the design of your preference. Sew each the HSTs together to create two rows (six HSTs per row). Press the seams in each row in opposite directions. Sew the two rows together to create a small panel. Press.
STEP FOUR:
Take the ribbon you used to measure your child’s head and compare it to the size of the panel you sewed together. It’s okay if the panel is smaller than the ribbon. If the panel is bigger than the ribbon, trim each side equally until it is the same length of the ribbon.
STEP FIVE:
Cut the backing fabric, batting, and interfacing to the same width and height of the fabric panel you just created (roughly 21” x 7.5”). According the the interfacing/stabilizer instructions, fuse the interfacing/stabilizer to the backing fabric.
STEP SIX:
Cut a zig zag on the top of the panel, batting, and backing fabric to create the pointy tops (technical term), and valleys of the crown. I find that three pointy tops/spikes are the minimum amount required to achieve the most royal look for the little highness in your life. Make sure to allow for a 1/4” seam allowance as you cut around each crown spike and valley.
STEP SEVEN:
Face the right side of the fabric towards the batting (interfacing side showing), and the right side of the pieced panel facing the batting to make a quilt crown sandwich. Pin one ribbon on each side of the crown, so that just a little bit is peaking out. Make sure to avoid sewing over the long part of the ribbon when sewing your crown sandwich together (washi tape helps to wrangle those ribbons). Use quilt clips around the edges to keep it all together.
STEP EIGHT:
Sewing time! Sew a 1/4” seam around the crown perimeter, leaving a four inch opening on the non-pointy part of the crown. Reverse stitch over the ribbon to ensure durability. In the crown valleys, cut a slit from the edge of the fabric to the seam (careful to not cut the seam!).
STEP NINE:
Turn the crown inside out through the four inch opening. Make sure the ribbons are untucked. Using a chopstick or dull pencil, poke the spikes of the crown so they are regally pointy. Press.
STEP TEN:
Using a ladder stitch, close the opening of the crown. OR if you’re a wabi-sabi mommy like me, just iron the seam allowance folded and top stitch over the opening. Top stitch 1/8” around the bottom (flat part) of the crown and up the sides (going over the ribbon). Press. If using satin ribbon, cut the ends on an angle and heat seal it using a lighter or candle to avoid unraveling. Be careful! This should only take a couple of seconds, you wouldn’t want to light your whole project on fire! We’ll leave that to the dragons.
STEP ELEVEN:
Bedazzle time! Embellish your crown- you could put pom-poms on the spikes, or ric rac trim, or fancy buttons, or sequins, or jewels, or puffy paint, or quilt it… or do ALL of it! Let your imagination run wild, and of course ask for the input of your mini majesty.
STEP TWELVE:
Enjoy! Read The Paper Bag Princess, have a tea party, make a paper bag gown, and do all the royal things! Take photos for lasting memories and use the #PBPDay and #CobabeCo to inspire others.
If you haven’t read the story, check out this link to hear it from the author as he reads it to his daughter and granddaughter:


